


The NexGEN application is an integral part of WDI’s Project Delivery Process. NexGEN is used internally and externally to govern and manage our standardize processes for budget management, contract management, change management, and invoicing. NexGEN is a web-based application that has streamlined our processes, minimized duplicate touch points, and provides an enhanced user interface that operates on most browsers (i.e., MAC, mobile and tablets).
Being an Active Participant in this journey and understanding the role you play in the process has a big impact on the success and adoption of the tool by:
Gathering and storing valued Project Information
Perceptions of how the tool is viewed and its value
Effective and knowledgeable decision making by the Project and Executives based on improved data
Reporting efficiencies and standardization
Elimination of duplicate efforts and off line processes and reporting
By understanding the importance of the tool and its support of our processes and the tool’s benefits will allow us to achieve the goals that have been set as an organization.
The tool provides the information needed to make informed and accurate decisions during the life of the Project including the Project health, Financial, Change Management, Risk/Trend Management, and Cost Reporting (Merlin) with ease is critical to our success. Your involvement in making the tool a priority contributes to all of these factors.
The adoption of NexGEN is the responsibility of all participants. It will continue to be part of our delivery process and must remain relevant as an enterprise tool which drives our businesses best practices. Your active participation and feedback will contribute to our success.
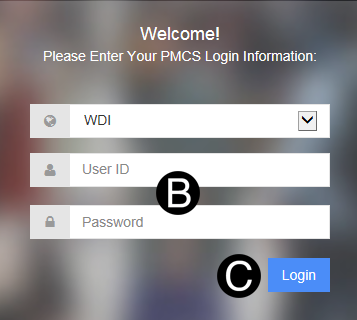
Step 1: Log in to NexGEN .
OR Go to NexGEN: http://wdi.rundingproliance.com/account/login Shanghai users https://wdi-apac.rundingproliance.cn/account/login Paris users https://wdi-fr.rundingproliance.fr/account/login
|
 |
There are multiply ways to access documents that have been sent to you for action.
Within the NexGEN Application
Email Notifications
Colored Notification Boxes: They move from right to left based on aging. The green, yellow and red are tasks that you must take action and the blue are FYI’s only. - RECOMMENDED.
Bell and Calendar icon on the top right: the Bell is for FYI only and in alignment with the blue notification box and the calendar is in alignment with the 3 aging boxes. This option gives you the documents in a different way.
Tile Approvals can be accessed under Notifications>Tile Approvals.
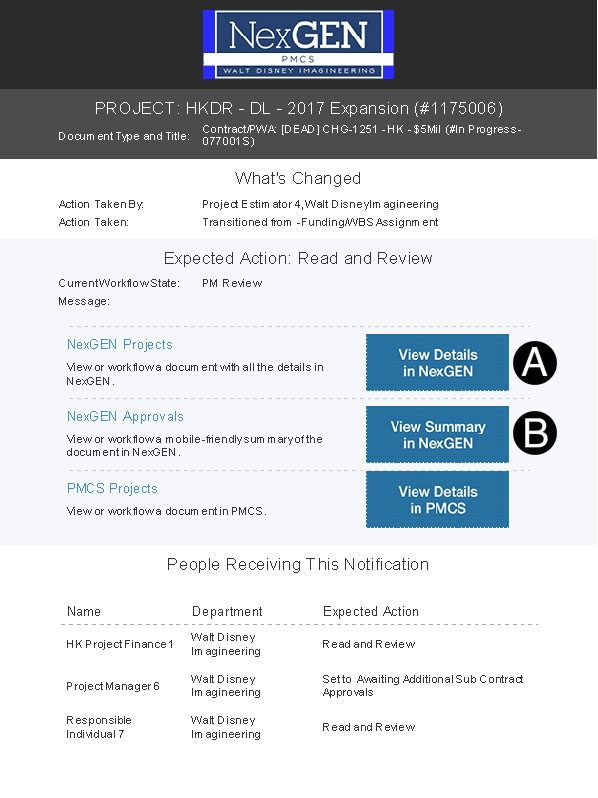
The screenshot shown below marks two links that can be used to access NexGEN and bring you to the Login screen. Once logged in it brings the user to the Approval Tile or the Actual Document so that a review/update or approval to workflow.
The Email notification contains Hyperlinks.
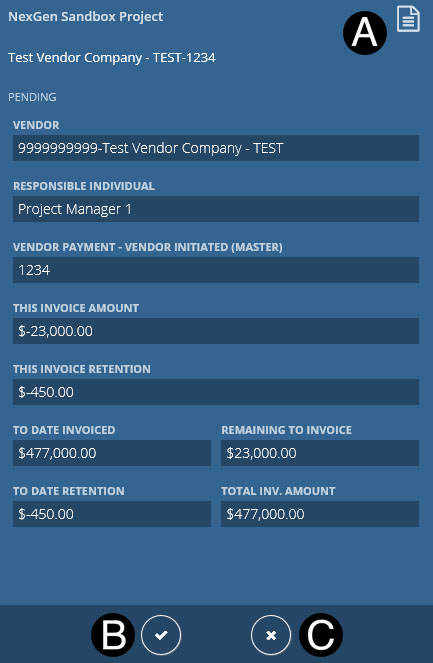
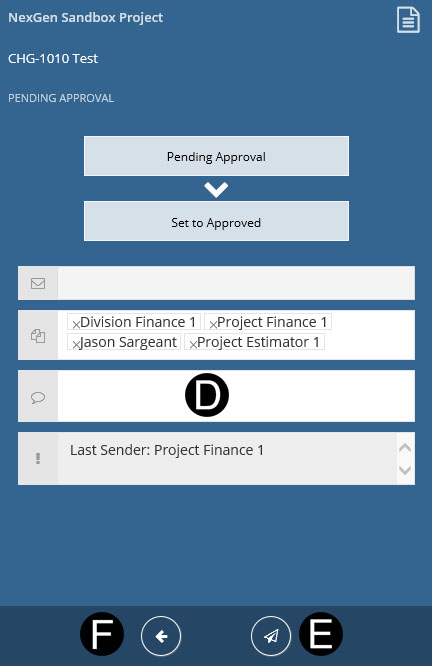
Process steps that do not require any update of information or additional attachments may be workflowed from the Tile Approvals. You can gain access to the Tile Approvals in multiple ways per the section above. Either through the Navigation Pane “Notifications” or Email Notification. Key pieces of information are available that should allow you to take action without looking at the document.
The Document can be opened from the Tile Approvals if need by clicking the Document Icon.
The approval workflow icons are used to workflow the Document. Clicking on the Workflow Approve Icon will flip the tile to show who the document is going to and allow a custom message or selection of a specific workflow if you have multiple options.
By clicking on the Decline/Return Icon will flip the tile to show who the document is going to and allow a custom message.
A custom message can be entered for the workflow.
Click send Icon to Workflow.
The back Icon will return back to the front of tile without any Workflow.
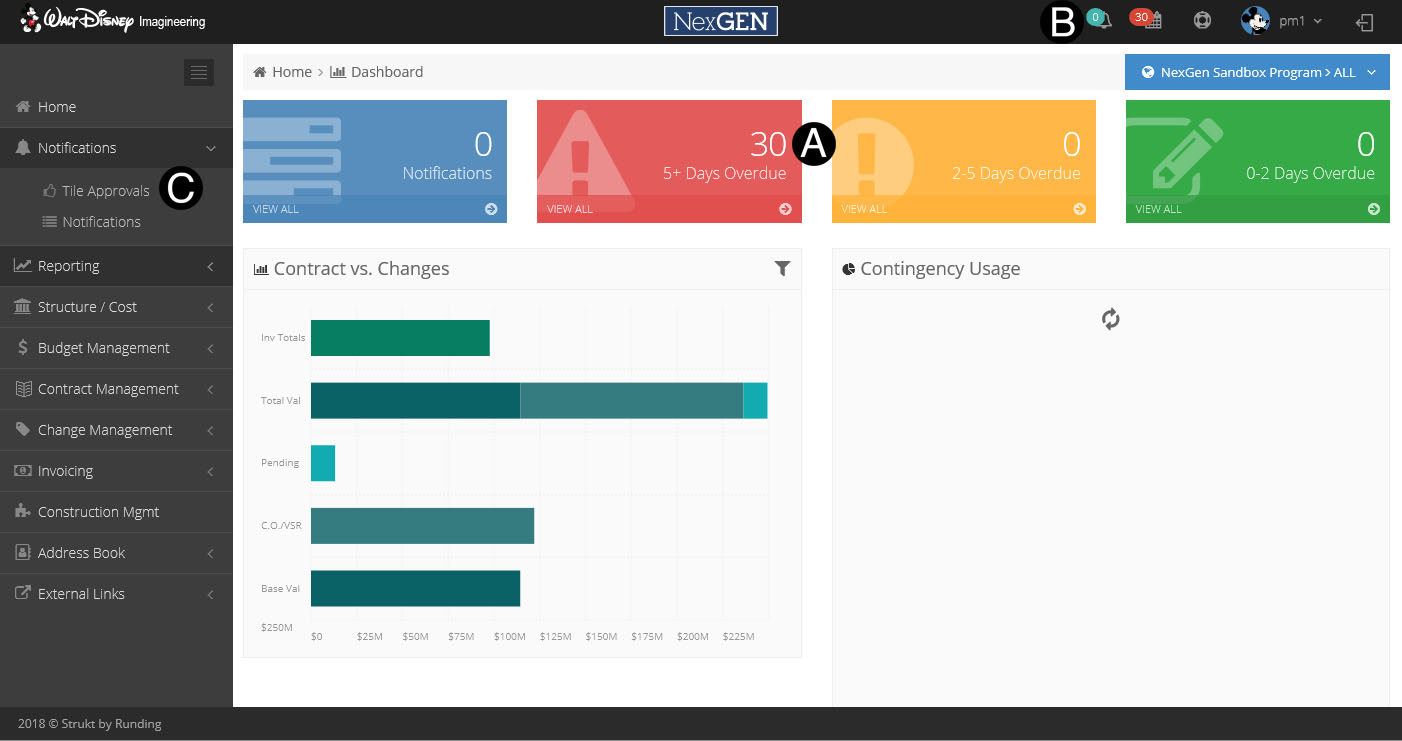
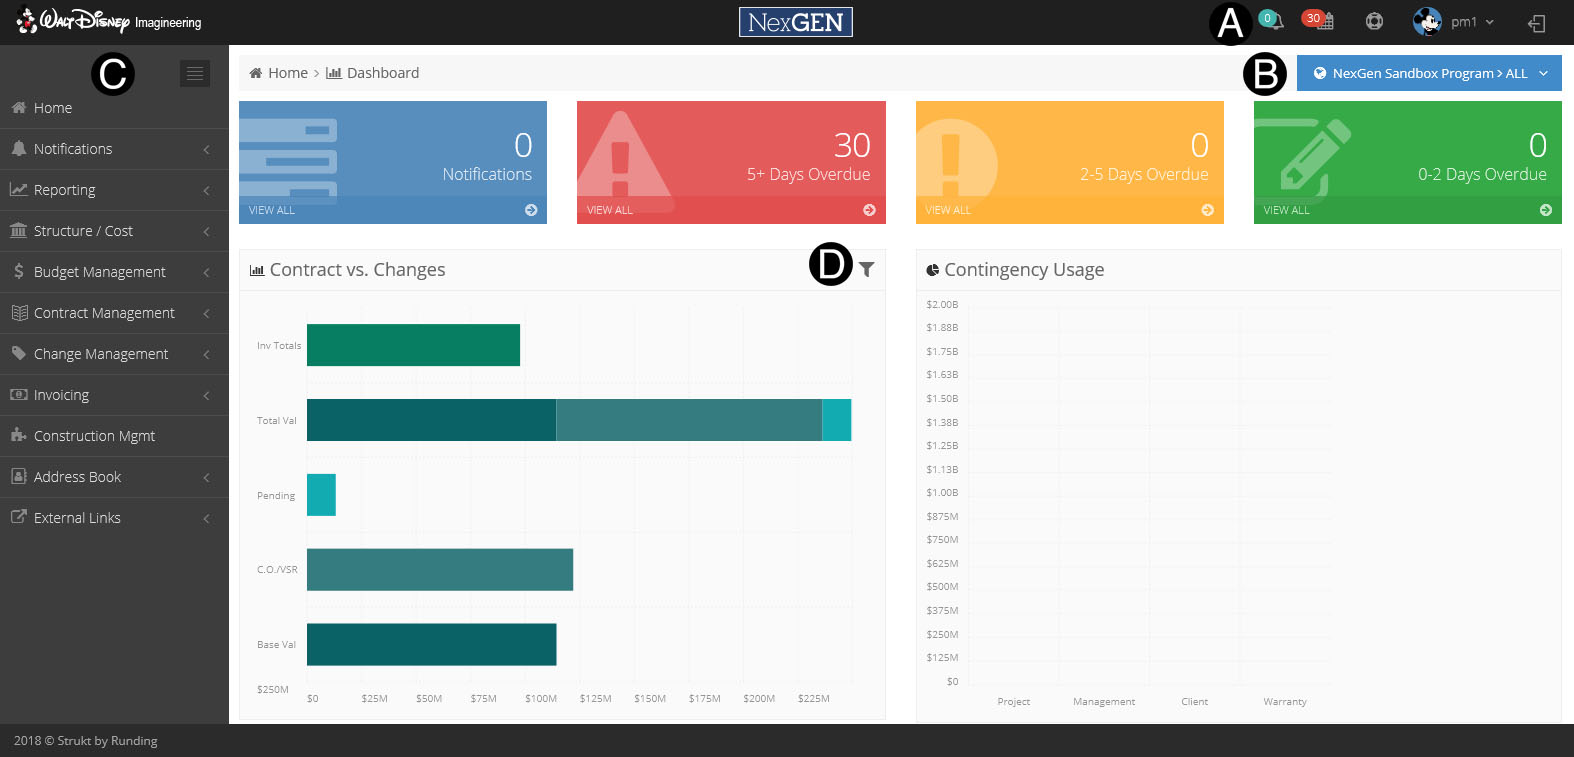
The welcome screen is known as the Dashboard. You can access all the area of NexGEN. The Dashboard also contains many helpful tools and the status of outstanding and overdue items that need attention.
A. The Menu bar located at the top will always display. The Menu Bar give access to the following:
![]() By clicking this icon you
will be navigated to the Notifications and all Notifications will be displayed
both current and overdue.
By clicking this icon you
will be navigated to the Notifications and all Notifications will be displayed
both current and overdue.
 By clicking this icon you
will be navigated to the Overdue Notification.
By clicking this icon you
will be navigated to the Overdue Notification.
 By clicking this icon you
can review FAQ and send an email to the NEXGEN
Team to request support for an issue you may be experiencing.
By clicking this icon you
can review FAQ and send an email to the NEXGEN
Team to request support for an issue you may be experiencing.
The drop-down list to the right of your username is where you can access the sign off option from the system.
![]() The Document Drawer icon will
display your progress and errors when saving or Workflowing documents. To open the File cabinet
just click the icon. To
close you can click the File Cabinet icon again. You will need to clear
any errors in red or the document will remain with you
The Document Drawer icon will
display your progress and errors when saving or Workflowing documents. To open the File cabinet
just click the icon. To
close you can click the File Cabinet icon again. You will need to clear
any errors in red or the document will remain with you
· All successful notifications clear within an hour.
· Error notifications clear within 7 days.
· To access the document via the drawer, right mouse click on the error and you can select to navigate to the document.
B. The
Project List will be all projects that you have access to but can be filtered
by clicking the world icon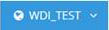 and selecting your
Org, Program and Project.
and selecting your
Org, Program and Project.
C. The
Navigation Pane on the left hand side will always display and is where
you can navigate to the different process in the Projects duration. Process that reflect
this icon  are
future process that will be upgraded later. If
a process is not part of NexGEN the user will continue the use of the
legacy process and applications until its inclusion in NexGEN.
are
future process that will be upgraded later. If
a process is not part of NexGEN the user will continue the use of the
legacy process and applications until its inclusion in NexGEN.
To collapse or expand
the Navigation Pane click . To
return back to this Dashboard page just click Home.
. To
return back to this Dashboard page just click Home.
D. The Dashboard graphs will display current data for Project or Projects based on your Project List (see B). These graphs are only visible internally
These graphs can be filtered
as well by selecting the![]() .
.
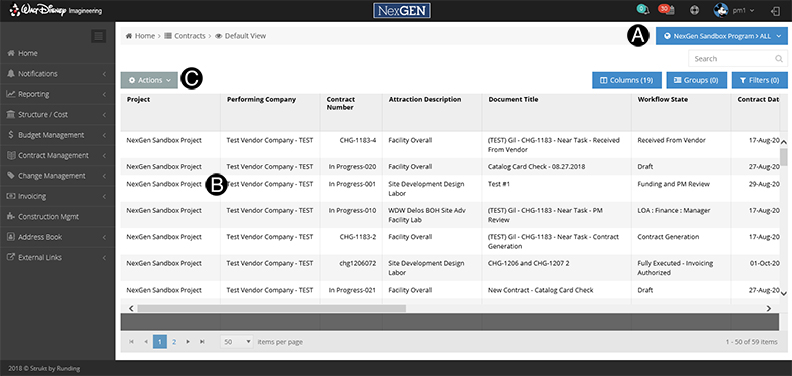
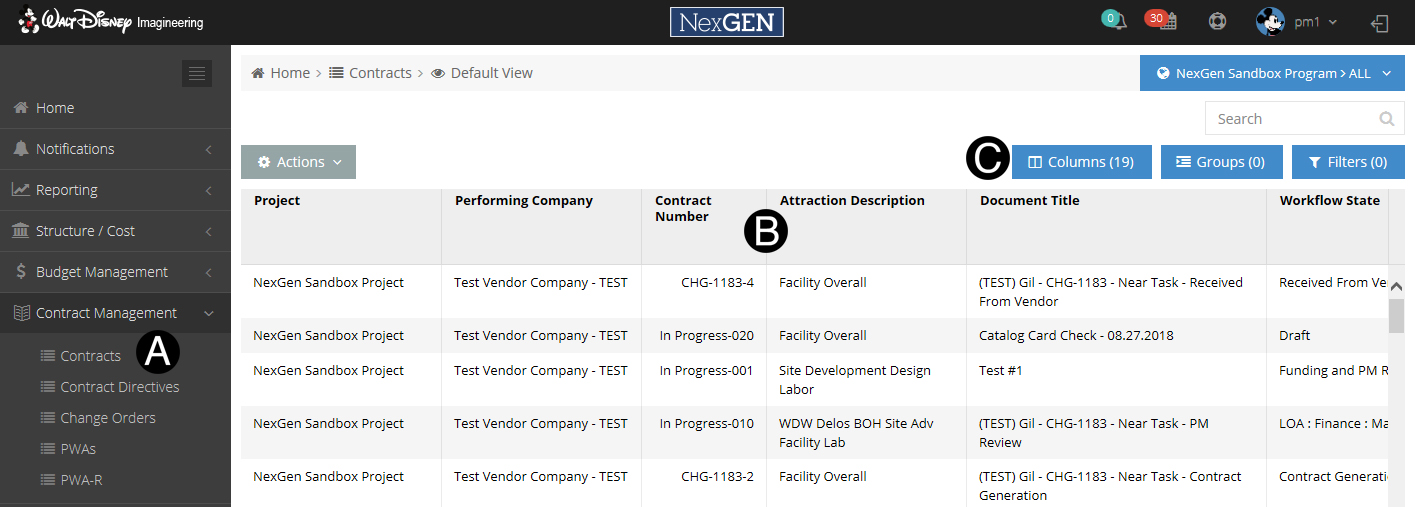
To access click on the process from the Navigation Pane and select from the expanded option (below the Contracting>Contract Register View example). These Register Views can be customized as well.
The Register View displayed will be based on your Project List mentioned above. You can filter by clicking the world icon and updated Org, Program, and Projects.
To open an item from the Register View double click the item or left mouse click to get the action list.
Actions drop-down list will give access to task actions defined below.
![]() Contact
the WDI.PMCS@disney.com inbox
to have additional shared view created.
Contact
the WDI.PMCS@disney.com inbox
to have additional shared view created.
You can create your own Custom Register Views that can be used for all of your projects that you have access to. You can arrange the columns in an order that is relevant to you and display data that can help you perform your needed tasks.
A. Go to the process folder you would like to create a Custom View.
B. Arrange columns by dragging and dropping as you would like them ordered. (in this example we are showing how to move Attraction Description to left)
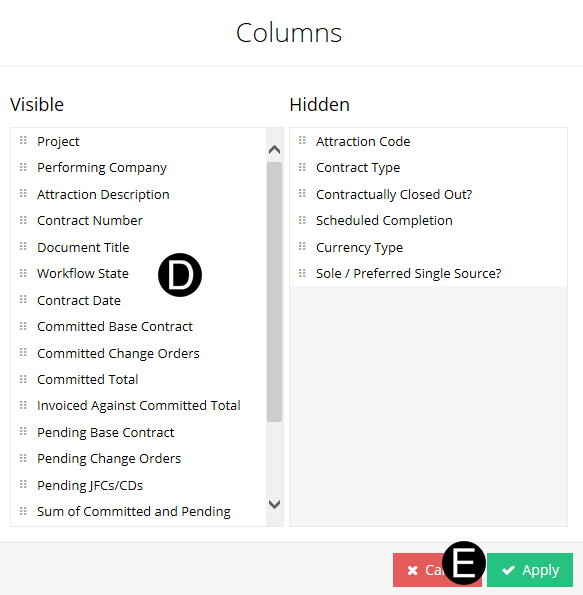
C. You can add more columns to your Custom Register View by Clicking Columns. (Optional)
D. Click additional columns on left and drop to the right column. You can also reorder the columns by clicking and dragging in to the custom order. (Optional)
E. Click Apply button.
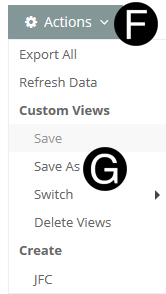
F. Click Actions drop down.
G. Click Save As
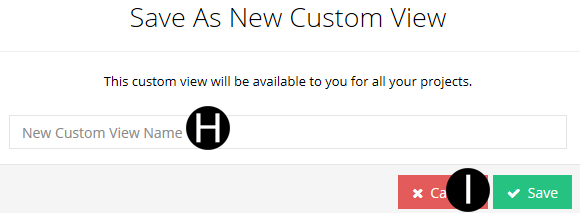
H. Enter name for your Customized Register View.
I. Click Save.
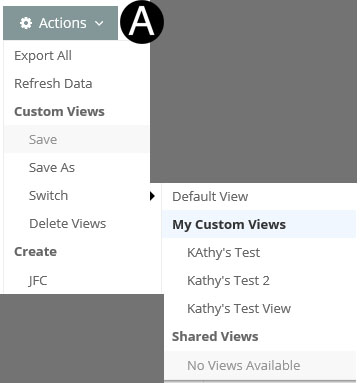
![]() Your
default view will be the last one used when you logged out. To change
your view go to Actions drop down, Switch and select the view you would
like from the pull down list.
Your
default view will be the last one used when you logged out. To change
your view go to Actions drop down, Switch and select the view you would
like from the pull down list.
Within Register View tasks can be started by accessing the Action drop-down list.
Click Actions drop-down list.
Export All: will download the Register View to excel.
Refresh Data: will update the Register View and is used when documents are Workflowed.
Custom Views: is where you can create your own views as well as have visibility to standard views. (The last view selected when exiting will be displayed when you return.)
Create: is used to start a new document under each process (example: creating a new JFC as shown here)
A. The Header Summary will display key data and information pertaining to the Document.
B. The Main Document Header is where the Save and Workflow options can be found for a Main Documents.
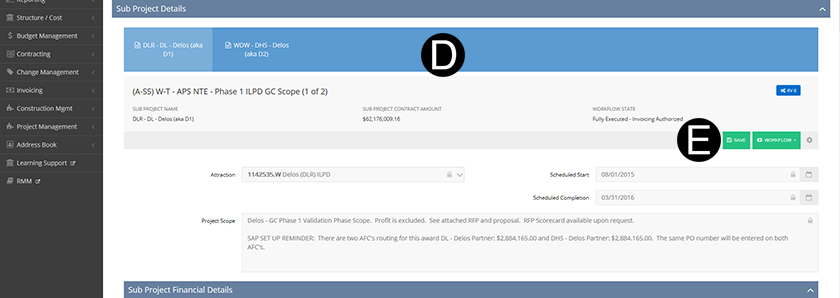
C. Document Details Headers will separate the sections of the Document and be a summary/roll-up when the sub-project feature is used.
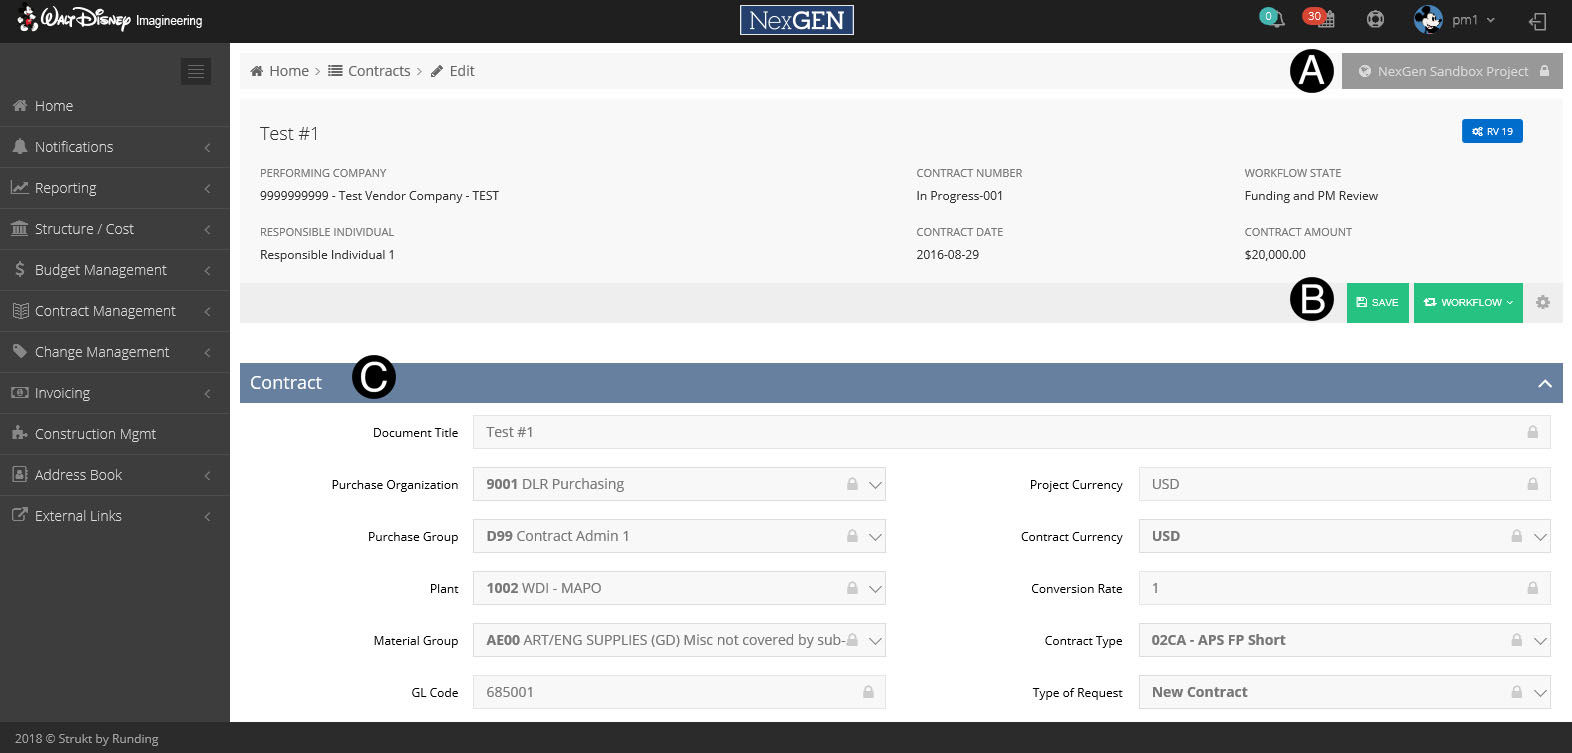
![]() If
a Contract has Sub Project there will be tabs that toggle in the Sub Contract
details that control all Sub Project sections of the document.
If
a Contract has Sub Project there will be tabs that toggle in the Sub Contract
details that control all Sub Project sections of the document.
D. The Sub Project Headers separate the specific details of that project.
E. The Sub Project will have its own save and workflow options that are separate from the Main Document.
Attachments and supporting documents can be added to the document depending on one's permissions/roles and the current state that the document is in.
A. Each of the icons will identify the document type of the attachment (PDF, Spreadsheet, etc.)
B. Attachment Access Icons
![]() Delete Attachment
Delete Attachment
![]() Attachment is visible
to Vendor
Attachment is visible
to Vendor
![]() Attachment is not visible to Vendor
Attachment is not visible to Vendor
![]() Download Attachment
Download Attachment
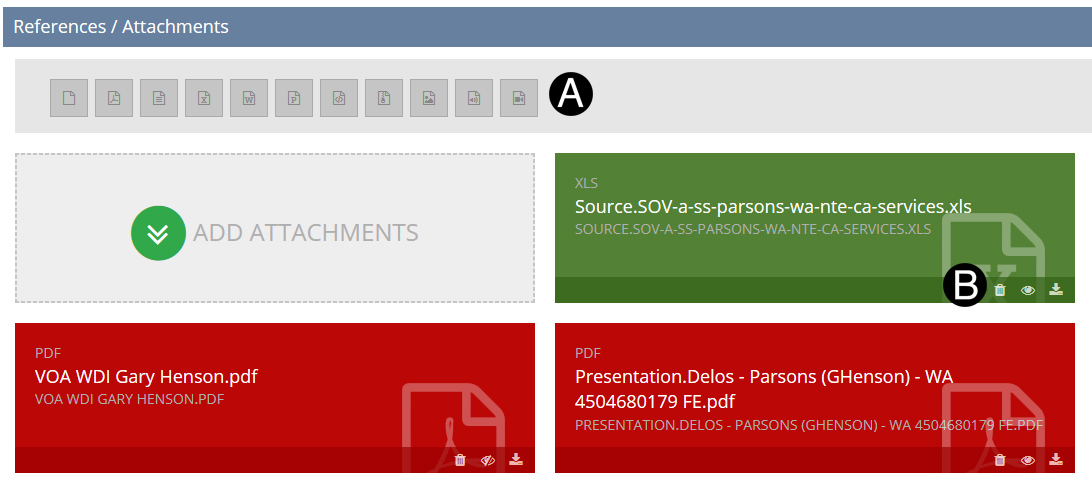
![]() You can add attachments
or change Vendor visibility to an attachment at any time. Open the
document and make the adjustment to the Attachment Icon or Add Attachments
then Click
You can add attachments
or change Vendor visibility to an attachment at any time. Open the
document and make the adjustment to the Attachment Icon or Add Attachments
then Click  in the header.
The fields on the document are managed by the icons below:
|
Populate using a pull down list |
|
Locked |
|
Populate using a date picker |
|
Populate free text and numberic values |
|
Adjust by a tickle and clicking on the highlighted section |
If there is an error in a field when saved or workflowed it will be highlighted in red as below.
A. To view the error type hover over to see the error.

B. When you correct error and save the document you will get the below confirmation check mark.

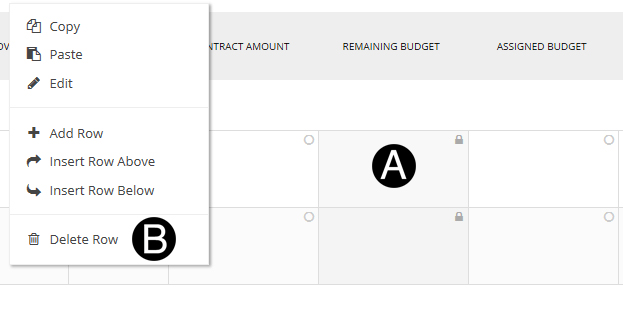
To delete a row in the SOV section complete the following steps:
A. Right mouse click the SOV row you wish to delete.
![]() Do not click the number to the far right.
Do not click the number to the far right.
B. Then click the Delete Row option.
There are 2 workflow options. Save is only required when creating a new document that you have attachments, otherwise there is not a need to save. You can just workflow:
1. Main Document: Used by those working on the overall document (example: Vendors)
2. Sub Project Document: Used by those working on a specific project (example: Project Estimators)
You can create a shortcut to be on your home screen of your tablet or mobile device by following these steps.
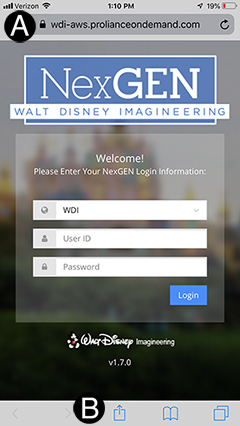
Step 1: Log in to NexGEN .
OR Go to NexGEN: https://wdi-aws.prolianceondemand.com Shanghai users https://wdi-apac.proliance.cn/account/login Paris users https://wdi-fr.rundingproliance.fr/account/login |
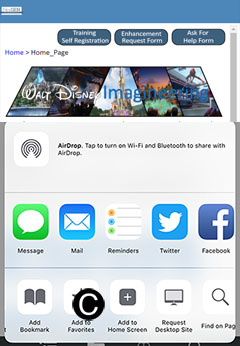
B. Click on Share icon.
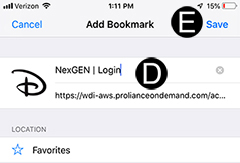
C. Click on Add to Home Screen button.

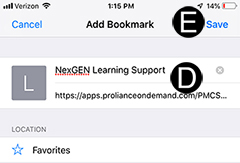
D. Enter in name for your shortcut. (Optional)
E. Click Save.
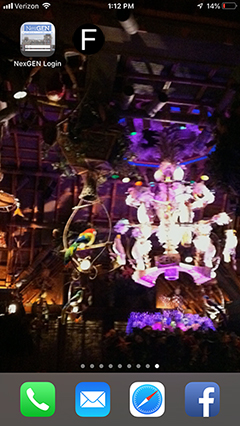
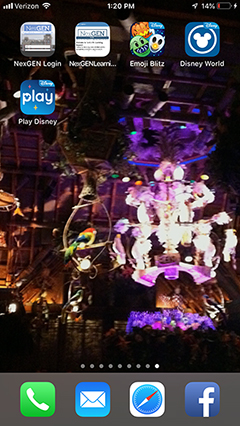
F. The icon shortcut will appear on your home screen.
You can create a shortcut to be on your home screen of your tablet or mobile device by following these steps.
A. Navigate to NexGEN Learning Support https://www.rundingproliance.com/PMCSLearningSupport/Landing/index_1.htm#t=index_1_1.htm
B. Click on Share icon.

C. Click on Add to Home Screen button.
D. Enter in name for your shortcut. (Optional)
E. Click Save.
F. The icon shortcut will appear on your home screen.
Learning Support can be accessed on many different devises including tablets and mobile devises.
Learning Support can be accessed from the following URL:
https://www.rundingproliance.com/PMCSLearningSupport/Landing/index_1.htm#t=index_1_1.htm
![]() Search
will display all topics in Learning
Support only click on items that are for your specific location.
Search
will display all topics in Learning
Support only click on items that are for your specific location.

Use buttons in-page links to jump directly to sections like:
Welcome Page. |
|
Main tools page example. |
|
Process Maps within Step-by-Step pages. |
|
Within Learning Support the following Icons will assist you:
Tips that will highlight information |
|
Warnings of information that needs to be completed or addressed |
|
Targeted information for a location |
|