

F.8.1 Draft: Select Settled CDs and Enter
Settled Values

Description
The Project Estimator creates
the Change Order and bundles settled CDs and adds attachment(s), as required.
Outcomes
Once a Change Order is initiated and submitted, it moves to the Responsible
Individual in the Settled
state.
Detailed Steps
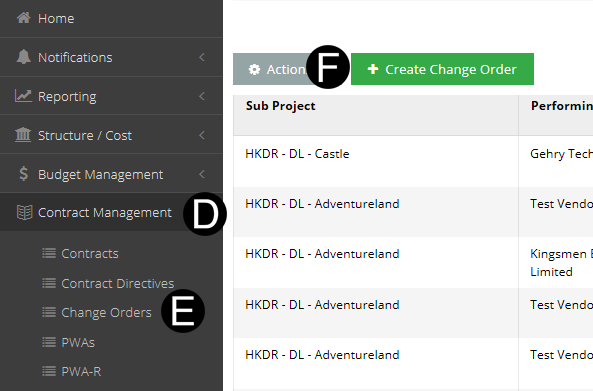
Step 1: Log in to NexGEN.
Select Contract Management
on Navigation Pane to expand.
Click Change Orders.
Click Create Change Order.
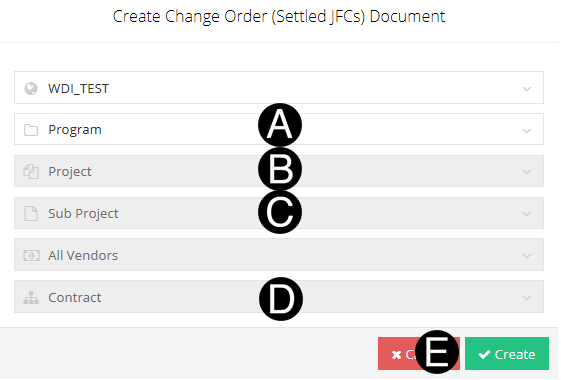
Step 2: Create Change Order.
Select/Verify Program
from the list.
Select/Verify Project
from the list.
Select/Verify Sub Project
from the list.
Select/Verify Contract
from the list.
Click Create
 Please
note that this contract dialog box filters on existing Contract
that are not in Closed Out state. Please
note that this contract dialog box filters on existing Contract
that are not in Closed Out state.
Please
note that this dialog box filters Contracts in Contract Generation
stage however Change Orders can not be Workflowed past Draft state.
 If you don't see the Contract Directives
you expect, ensure that the Contract Directive and the JFC are
in ready to be settled state. If you don't see the Contract Directives
you expect, ensure that the Contract Directive and the JFC are
in ready to be settled state.
|

Step 3: Complete all required fields on the Change Order.
Type Document Title in the field.
Select Attraction from list.
Verify Close Out yes
or no.
If Close
Out is selected Yes it
will cancel all pending JFC/CDs.
All Invoices
and Contract balance must be $0.00 to Workflow Close Out.
If distribution
list is used select correct attraction. |
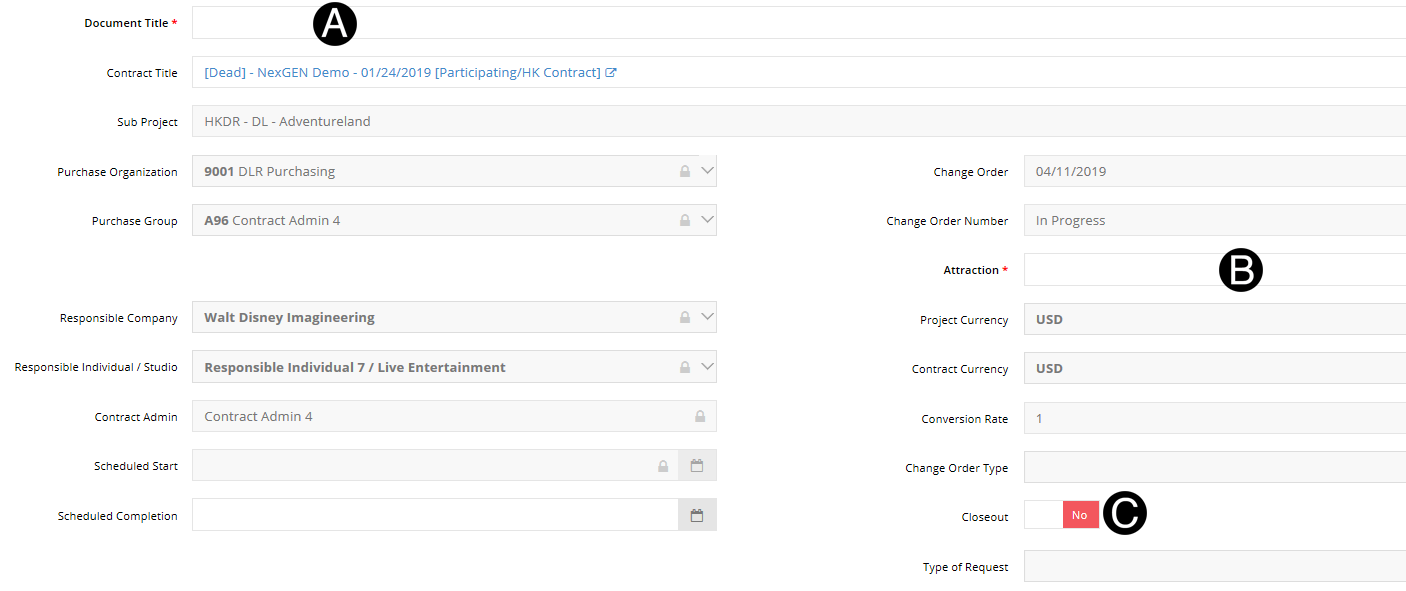
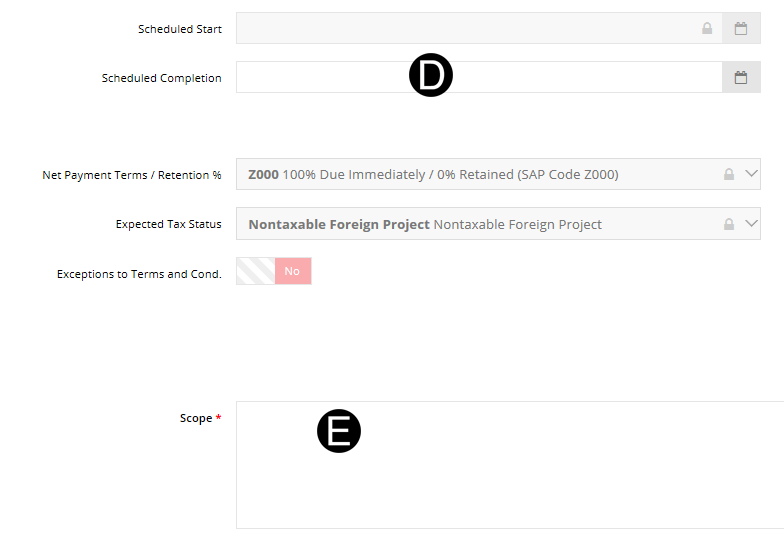
Select Scheduled Completion
from date picker.(Optional)
Type Scope in the field.
The
Change Order will not save if there are any errors, but will succeed
after selecting ok if there are warnings.
If
you have not yet completed the Change Order, you can Save as draft
without submitting and complete at a later time. |
Step 4: Select Contract
Directive.
A. Select
any Directive that have or will be settled for this Change Order. This
selection pre-populates the SOV Line Item Detail.


Step 5: Save the Change Order.
A. Click
 .
.
The Change
Order will not save if there are any errors, but will succeed
after selecting ok if there are warnings.
If
you have not yet completed the Change Order, you can Save as draft
without submitting and complete at a later time. |
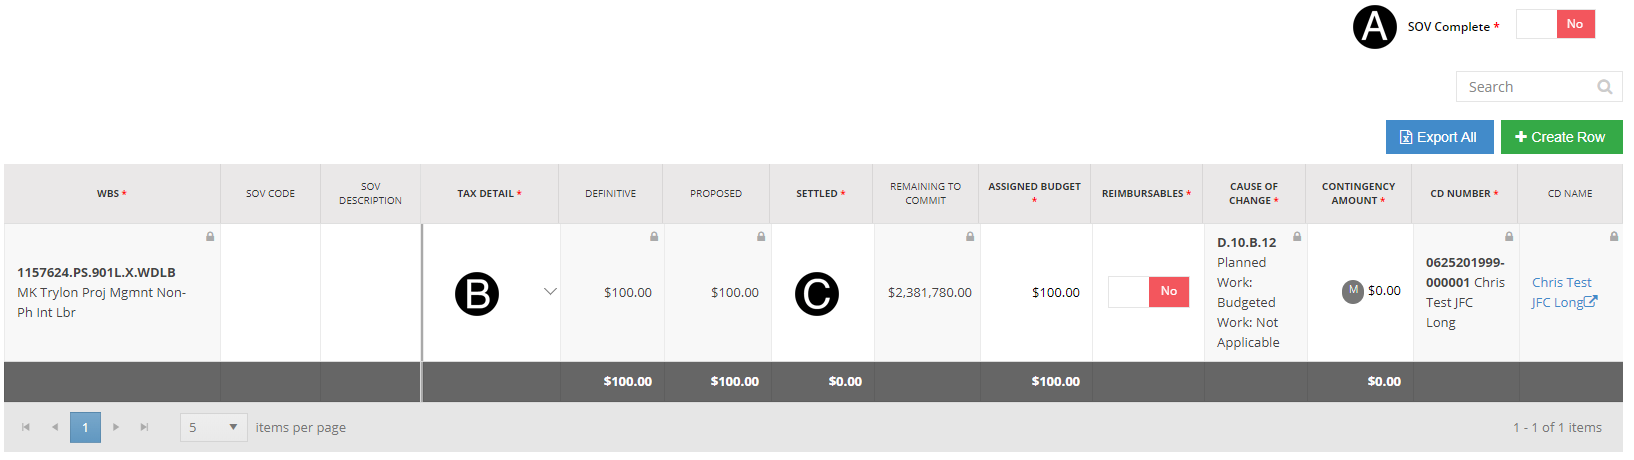
Step 6: Enter SOV Details
Toggle SOV
Complete Yes or No.
If SOV
Complete is toggled to Yes it will skip Pending
SOV State.
If SOV Complete
is toggled to No it will enter Pending SOV State where the Responsible
Individual and Vendor if participating can do any final edits
to the SOV. |
Select Tax
Detail from list.
Enter the Settled Value.

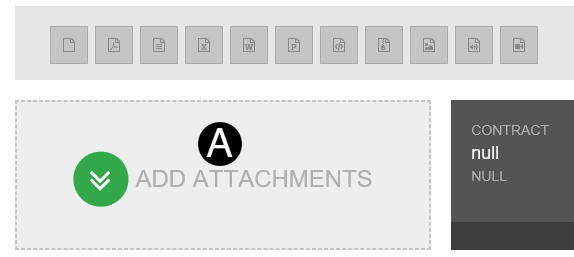
Step 7: Attach a document, sketch, or URL (if applicable).
A. Click
ADD ATTACHMENTS.
B. Select
the file to attach (Holding down Ctrl to select multiple attachments).
C. Click
Open to attach the document.
The
attachments will not be visible by default to the Vendor. If
they need to be, you will need to unlock the eye icon on the attachment.
Visible to Vendor  or
Not Visible or
Not Visible . . |
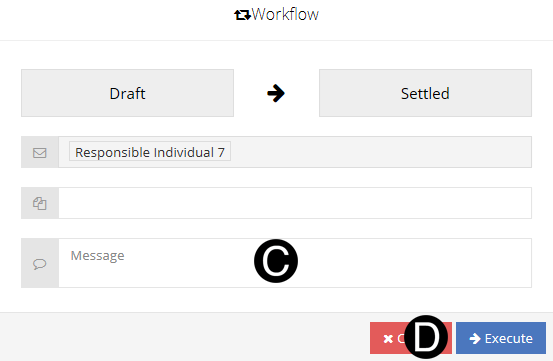
Step 8: Submit the Change Order.
A. Click
Workflow.
B. Select
Set to Settled.
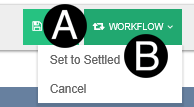
C. Type
a message in the Custom Message field to include in the Email notification
(optional).
D. Click
Execute.